MCP 101 - Kali Linux: Intro to Offensive Security with AI Agents
Introduction
The offensive security landscape is evolving fast. Researchers no longer just run tools manually — today it is possible to orchestrate AI agents that interact directly with our pentesting infrastructure. In this post we will walk through how to set up an environment based on the Model Context Protocol (MCP) that lets us, from a simple chat interface in VS Code, execute tools against a live target by routing through Kali Linux as the operations server.
What is MCP and Why Should We Care?
Model Context Protocol (MCP) is an open protocol that allows large language models (LLMs) to interact with external tools and systems in a structured way. Instead of the model simply generating text, MCP enables it to execute real actions: run commands, call APIs, read files, and in our case, launch offensive security tools.
In a research context, this means we can talk to an agent in natural language and have it — autonomously or guided — execute nmap, msfconsole, hydra, or other tools against our target.
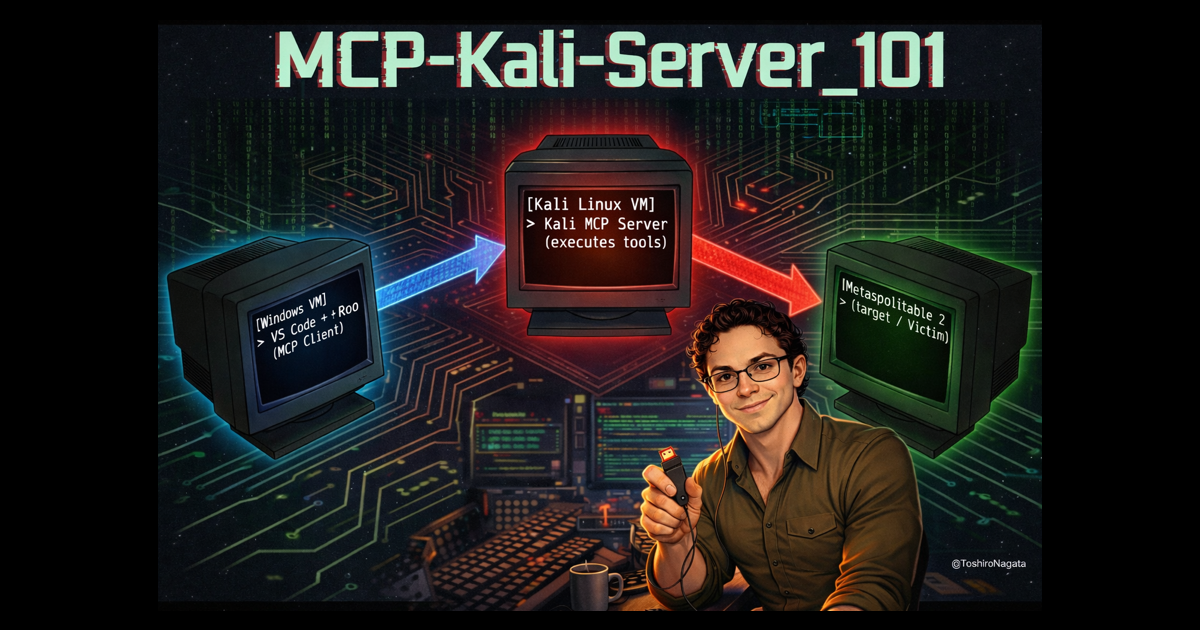
Lab Architecture
Our lab is composed of three virtual machines, each with a well-defined role:
 Architecture flow between Windows client and Kali server
| Machine | Role | Description |
|---|---|---|
| Windows | MCP Client / Interface | Runs VS Code with Roo Code. The “brain” where the researcher writes instructions to the AI agent. |
| Kali Linux | MCP Server / Executor | Receives calls from the Windows client over the network and executes the actual offensive tools. |
| Metasploitable 2 | Target / Victim | An intentionally vulnerable machine, isolated on our lab network to receive the attacks. |
The flow works as follows: the researcher sends instructions from Windows using Roo Code (acting as the MCP Client). That client connects over the network to the remote MCP Server hosted on Kali Linux. Finally, it is that Kali server that executes the real offensive tools against Metasploitable 2.
Part 1: Windows Setup
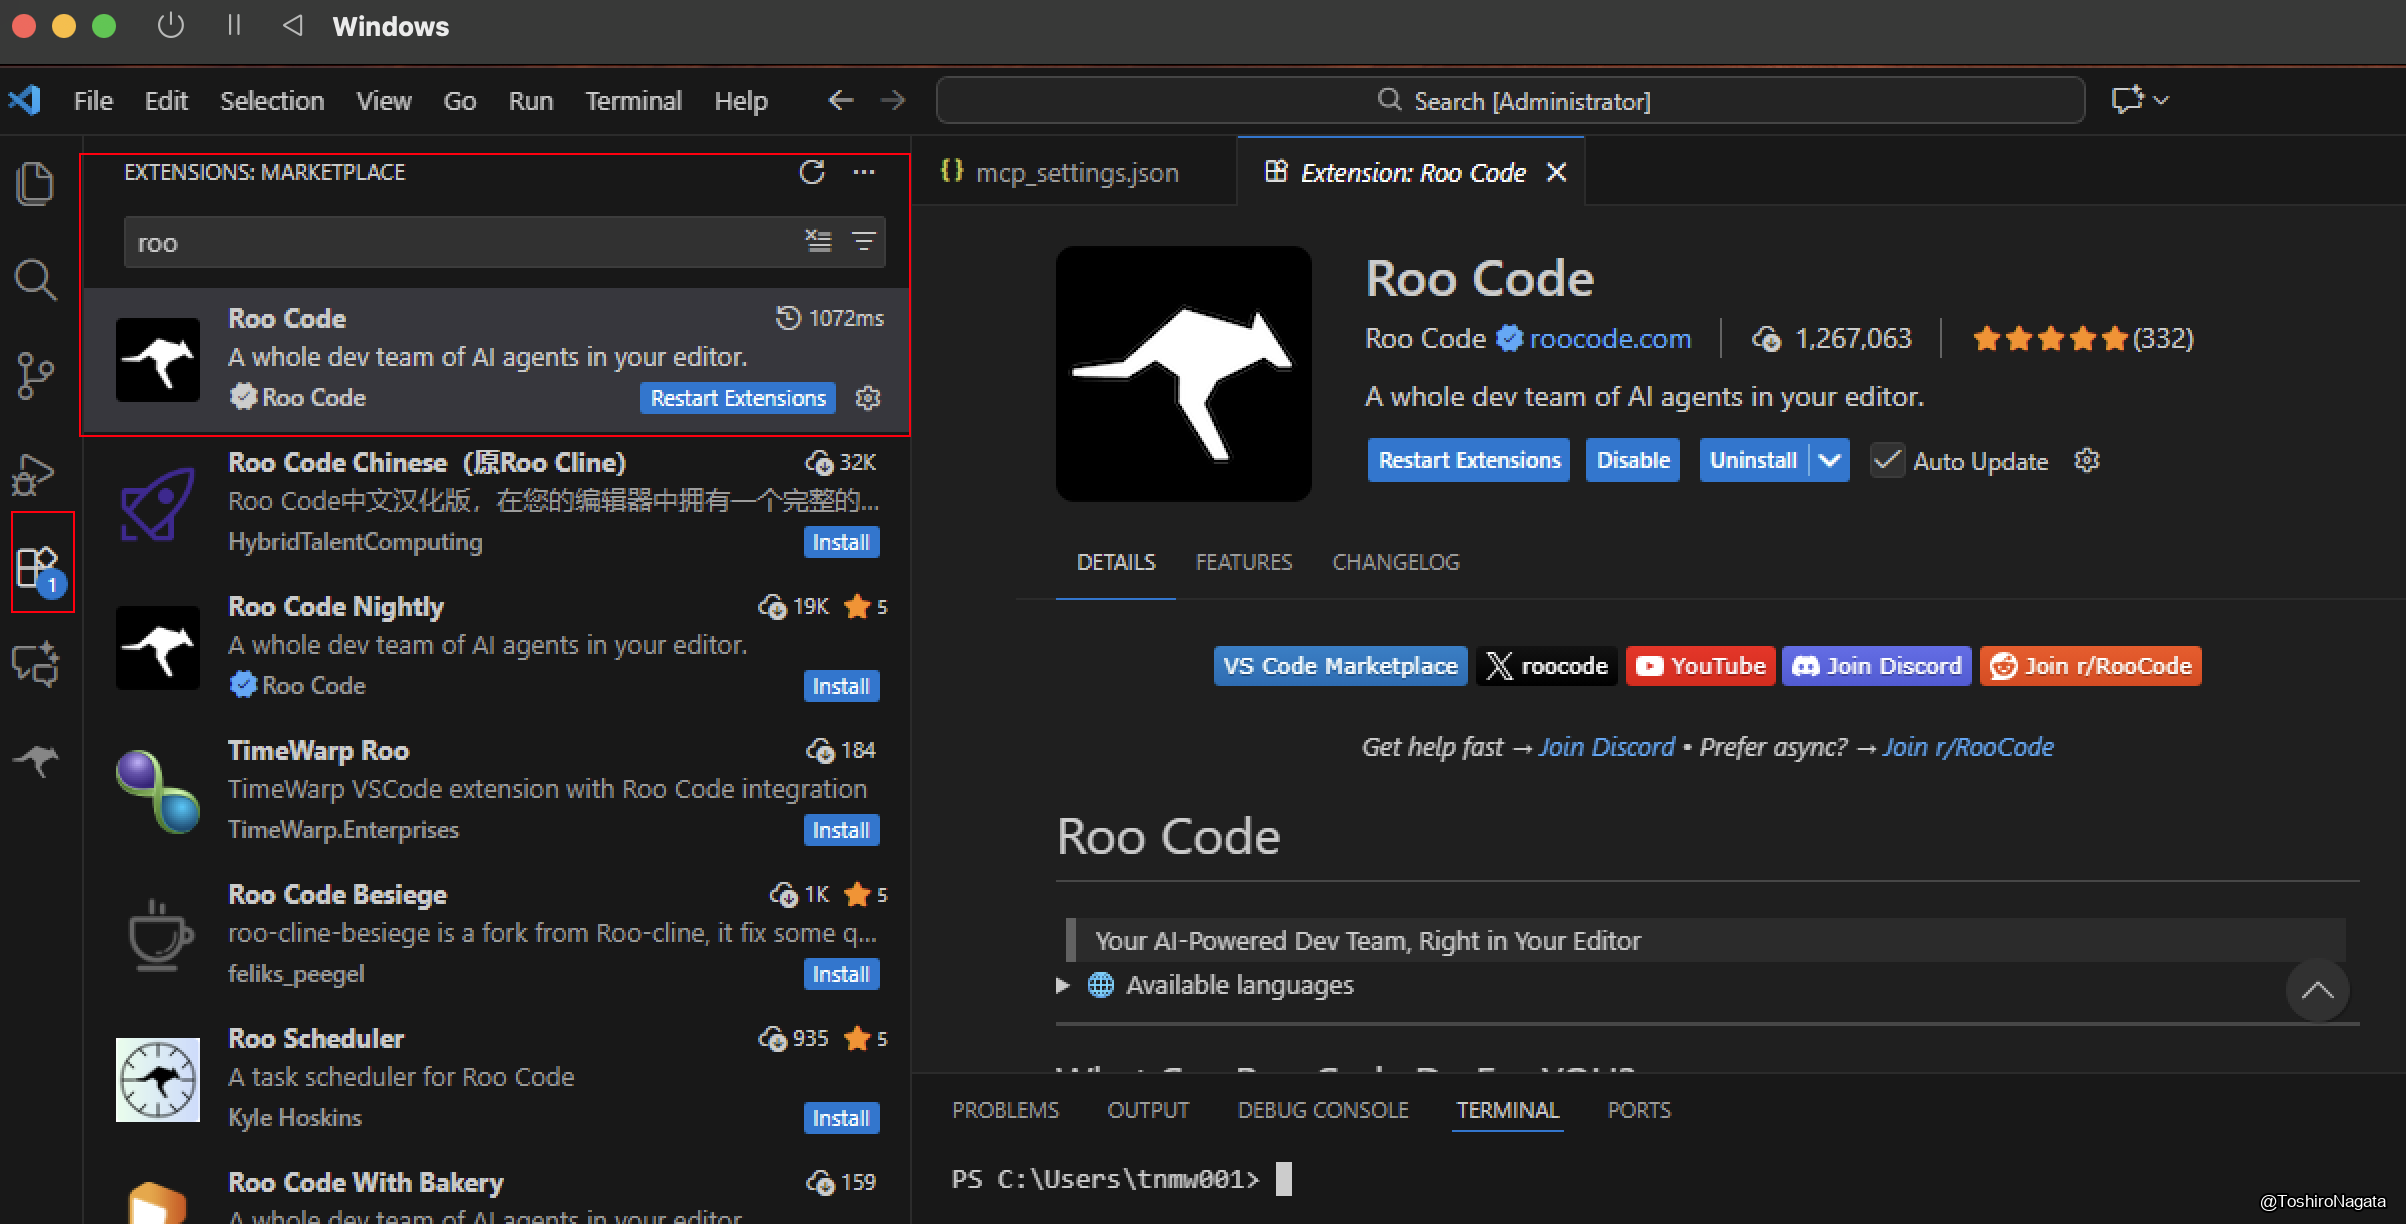
1.1 Installing Roo Code in VS Code
The first step is installing the Roo Code extension in Visual Studio Code. Roo Code is an extension that acts as an AI agent interface inside the editor, letting us connect to LLM providers and MCP servers.
To install it, open VS Code, go to the Extensions tab (Ctrl+Shift+X), search for roo, and select Roo Code by roocode.com.
1.2 Configuring the AI Provider: Google Gemini
Once the extension is installed, we need to configure which language model Roo Code will use for reasoning and decision-making. In this case we use Google Gemini, taking advantage of its generous free tier and large context window.
From the Roo Code panel, go to Settings → Providers and select Google Gemini as the API Provider. The system will prompt you to supply a valid API Key to proceed.
Roo Code settings panel showing Google Gemini selected as the provider with the API Key field pending.
1.3 Obtaining the Google Gemini API Key
To get the API key, navigate to aistudio.google.com/api-keys. From this page you can manage all your Gemini API access keys.
Google AI Studio “API Keys” page showing an existing key and the “Create API Key” button.
We will create a new key specifically for this project. Clicking “Create API Key” brings up a dialog where we assign a descriptive name. We use the naming convention MCP-Kali-tnb1 for clear identification, and associate it with the corresponding GCP project (MCP-tnb1).
“Create a new key” dialog with the name
MCP-Kali-tnb1and theMCP-tnb1project selected.
Once created, the key appears listed in the AI Studio dashboard. Note that it operates under the free tier, which is sufficient for our lab. To copy it, use the copy icon on the right side of the entry.
Key listing showing
MCP-Kali-tnb1created Feb 17 2026, with the copy button highlighted.
With the key copied, return to the Roo Code settings panel, paste it into the Gemini API Key field, and save. The invalid-key error disappears.
1.4 How Does the Agent Reason? (The Decision Flow)
Before moving on to server configuration, it is critical to understand how these components interact.
When we write an instruction in Roo Code (e.g., “scan this IP”), the reasoning flow is as follows:
- The Contextual Prompt: Roo Code packages our instruction as text along with the context of the MCP tools it has been configured with (in our case, the Kali tools).
- The Brain (Gemini): This package is sent to the Google Gemini API. The language model processes our request, understands we need to perform a scan, and reads in its context that a tool called
nmap_scanis available. - Function Calling: Gemini does not execute the scan. Instead, it responds to Roo Code saying: “To complete this task, I need you to execute the
nmap_scantool with parameters X and Y.” - Execution: Roo Code receives this structured response and is the one that dispatches the order over the MCP protocol to our Kali machine.
The LLM never touches our local network or the target — it acts purely as a tactical advisor telling our local client which buttons to press.
Part 2: Downloading and Configuring the MCP Server on Windows
2.1 The MCP-Kali-Server Repository
The central component of this lab is MCP-Kali-Server, an open source project available on GitHub under the user Wh0am123. This server acts as the bridge between the LLM world and the actual Kali Linux tooling.
The project’s internal architecture consists of two main Python scripts:
kali_server.py: A Flask server that exposes REST endpoints. This is the process that runs on the Kali machine and receives instructions via HTTP to execute tools such asnmap,hydra,nikto, etc.mcp_server.py: The MCP client that runs on Windows. This process speaks the MCP protocol with Roo Code locally (stdio), and translates tool calls into HTTP requests directed at the Flask server on Kali.
Download the repository directly from GitHub. We opted for Download ZIP to simplify installation on the Windows machine, though git clone works equally well.
GitHub repository
Wh0am123/MCP-Kali-Serverwith the clone/download menu open.
Once downloaded and extracted, the directory contains among other files the requirements.txt with the necessary dependencies and mcp-kali-server.json, a reference configuration file for importing the server into Roo Code.
python -m pip install -r requirements.txt
2.2 Registering the MCP Server in Roo Code (mcp_settings.json)
With the files in place locally, the next step is registering the MCP server inside Roo Code. This is done by editing the extension’s global mcp_settings.json file.
VS Code showing the configured
mcp_settings.jsonwith thekaliserver active in Roo Code’s MCP Servers panel, alongside the terminal showing the extracted project files.
located at:
1
C:\Users\<user>\AppData\Roaming\Code\User\globalStorage\rooveterinaryinc.roo-cline\settings\mcp_settings.json
The configuration we add defines an entry called kali inside the mcpServers object. The critical parameters are:
1
2
3
4
5
6
7
8
9
10
11
12
13
14
15
{
  "mcpServers": {
    "kali": {
      "command": "C:\\Users\\tnmw001\\AppData\\Local\\Programs\\Python\\Python312\\python.exe",
      "args": [
        "-u",
        "C:\\Users\\tnmw001\\Downloads\\MCP-Kali-Server-main\\MCP-Kali-Server-main\\mcp_server.py",
        "--server",
        "http://192.168.70.2:5000/"
      ],
      "disabled": false,
      "alwaysAllow": []
    }
  }
}
Breaking down each parameter:
| Parameter | Value | Explanation |
|---|---|---|
command | Path to python.exe | Interpreter that will run the MCP client locally on Windows |
-u | Python flag | Forces unbuffered output, required for stdio communication with Roo Code |
Path to mcp_server.py | Local path | The MCP client running on Windows that speaks MCP with Roo Code |
--server | http://192.168.70.2:5000/ | IP and port of the Flask server on Kali Linux — this is the architectural key |
disabled | false | Server is active |
The design is elegant: from Roo Code’s perspective, the mcp_server.py process is simply a local MCP server communicating over stdin/stdout. Internally, that process acts as a proxy, forwarding tool requests as HTTP REST calls to the Flask server on Kali.
Part 3: Bringing Up the Server on Kali Linux
3.1 Starting the Flask Server
With the client configuration ready on Windows, we move to the Kali Linux machine to start the server that will receive instructions and execute the tools.
Inside the project directory, run:
1
python3 kali_server.py --ip 0.0.0.0 --port 5000
The --ip 0.0.0.0 flag tells the server to listen on all available network interfaces, not just loopback. This is mandatory for the Windows machine to reach it across the local network.
The server confirms startup with these key messages:
1
2
3
[INFO] Starting Kali Linux Tools API Server on 0.0.0.0:5000
* Running on http://127.0.0.1:5000
* Running on http://192.168.70.2:5000   <- This is the address reachable from Windows
The IP 192.168.70.2 corresponds to Kali’s eth0 interface, confirmed with ifconfig. This is exactly the address we set in the --server parameter of mcp_settings.json on Windows.
Kali terminal showing the Flask server starting on
0.0.0.0:5000andifconfigoutput confirming IP192.168.70.2.
Part 4: The Target — Metasploitable 2
4.1 Target Environment Reconnaissance
Metasploitable 2 is an intentionally vulnerable Linux distribution designed by Rapid7 for use in offensive security training and practice environments. It is the ideal target for this lab because it concentrates a large number of services with known, documented vulnerabilities in a single machine.
We verify its IP address with ifconfig:
1
eth0  inet addr: 192.168.69.4
Metasploitable 2 console showing
ifconfigwith IP192.168.69.4assigned toeth0.
With this, we have the complete network map of our lab:
| Machine | IP | Role |
|---|---|---|
| Windows (Roo Code) | 192.168.70.x | Client / Researcher Interface |
| Kali Linux (MCP Server) | 192.168.70.2 | Operations Server |
| Metasploitable 2 | 192.168.69.4 | Target |
⚠️ Note: The subnet difference (
192.168.70.xvs192.168.69.x) indicates that Kali has two interfaces or that the hypervisor handles routing between segments. Either way, Kali can reach Metasploitable and accept connections from Windows.
Part 5: The Agent in Action — First Reconnaissance Operation
5.1 Tasking the Agent and Running the Scan
With the full infrastructure up, it is time for the moment of truth. From the Roo Code interface on Windows, we give the agent the following natural language instruction:
“Could you scan the top 3000 most used ports on the IP address 192.168.69.4, identify the software versions running, and let me know if any of these services have known vulnerabilities?”
What happens next is a concrete demonstration of this architecture’s power. Before launching the scan, the agent performs an environment enumeration phase: it verifies which tools are available on the Kali server by checking for nmap, gobuster, dirb, and nikto. The Flask server logs on Kali confirm this:
1
2
3
4
[INFO] Executing command: which nmap
[INFO] Executing command: which gobuster
[INFO] Executing command: which dirb
[INFO] Executing command: which nikto
This behavior is noteworthy: the model autonomously reasons that before executing a tool, it must verify the tool exists on the remote system. Once confirmed, the agent decides to call the nmap_scan tool with the following parameters:
1
2
3
4
5
{
  "additional_args": "--top-ports 3000",
  "target": "192.168.69.4",
  "scan_type": "-sV"
}
The -sV flag is critical: it instructs nmap to perform service version detection, not just confirm whether a port is open. This is what will allow the agent to correlate versions against known CVEs in the next step.
The Kali server log confirms the actual command execution:
1
2
[INFO] Executing command: nmap -sV --top-ports 3000 192.168.69.4
[INFO] 192.168.69.3 -- "POST /api/tools/nmap HTTP/1.1" 200
Split view: Roo Code on Windows showing the task in progress and the
nmap_scanparameters, and the Kali terminal showing execution logs in real time.
5.2 Results: Vulnerability Analysis
Once the scan completes, the agent processes the raw output generated by nmap. Since the initial execution was limited to the -sV flag — focused exclusively on version enumeration and banner grabbing — the results did not include direct vulnerability or CVE information.
To fulfill the original prompt directive, the agent evaluates this output and autonomously decides to implement a second phase: it takes the newly discovered software versions and uses them as input to invoke searchsploit (the Exploit-DB command-line utility installed on Kali Linux).
The LLM (Gemini) acts strictly as the logical engine of the operation. Its role is to parse the raw nmap output, extract the service version strings (e.g., vsftpd 2.3.4 or Samba 3.X), and formulate syntactically valid queries for searchsploit. The agent then instructs the client (Roo Code on Windows) to send these structured queries as HTTP requests.
It is important to emphasize that the AI model does not execute code itself. It is the server hosted on Kali Linux that is responsible for running the searchsploit binary at the OS level and returning its stdout to the client. The model then receives this text and consolidates it into a structured report.
Roo Code panel showing the “Task Completed” report with a summary of open ports, detected versions, and vulnerability findings obtained via Searchsploit.
By analyzing the results returned from the local exploit database — identifying, for example, the vsftpd backdoor or the exposed shell on port 1524 — the agent correlates services with public vulnerabilities. This profiles the target’s attack surface and delivers the entry vectors needed to begin the exploitation phase.
What’s Next: Questions Left Unanswered
The agent doesn’t always do what we expect… and that’s the most interesting part
Throughout this first installment we’ve seen the full pipeline in action: environment setup, cross-machine connectivity, autonomous reconnaissance, and vulnerability analysis. However, during our testing with Gemini Flash, we observed some behaviors that — far from being dismissible errors — raise technically relevant questions worth investigating properly.
Two specific situations stood out:
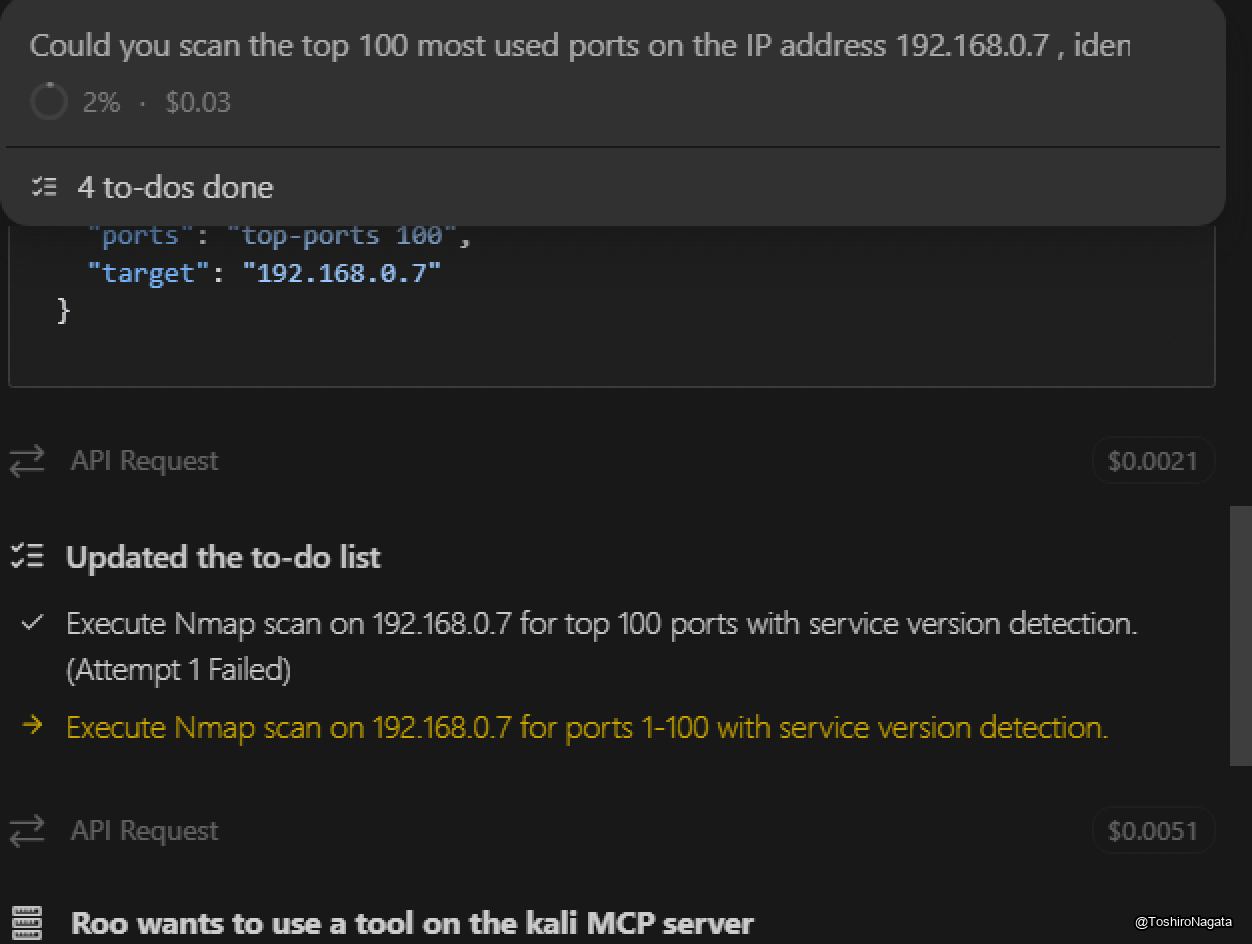
First: when asked to scan the top 100 ports of the target, the agent’s first attempt failed. Rather than retrying with the same parameters, it reformulated its approach and scanned the range 1-100 instead — which is not the same thing. Why did it make that decision? Is this a limitation in how the model interprets natural language? A translation issue between the MCP server and nmap’s parameter syntax? Or did the model simply reason that both approaches were equivalent when they are not?
Second: to look up known vulnerabilities in the detected services, the agent chose searchsploit over nmap’s built-in NSE scripts like --script vuln. Both are valid approaches, but they carry very different operational implications. Why did it choose one over the other?
These two decisions were not random. They reveal something about how the model reasons, how it prioritizes tooling, and how it handles failure. And that inevitably leads to the next question: would a different model have reacted differently to the same instructions?
That is exactly what we’ll be digging into next.
— To be continued in: MCP 101 - Part 2 - Analyzing Agent Behavior: Does the Model Matter?